Anther wonderful MAKE IT MONDAY tutorial is here...
I had a HARD time coming up with a name for this tutorial
And what I ended up with wasn't OVERLY creative...so call it what you may but here is today's tutorial :
ANTHROPOLOGIE INSPIRED KNOB PLAQUES
*warning A LOT of pictures*

What you need :

wood plaques
knobs
spray glue (optional)
modge podge
spray paint
e600 glue
scrapbook paper
sand paper (fine grit)
The Tutorial :
I bought these two wood plaques at Michaels for under $4 each
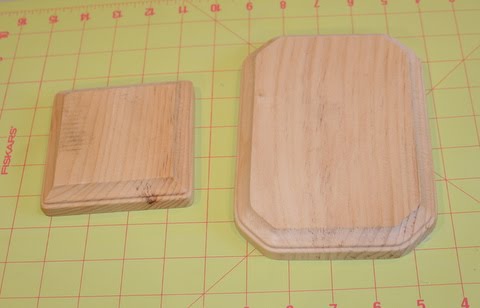
I picked a cream for the large wood plaque and a soft yellow for the small one
Spray paint and let dry

Next pick a cordinating paper to modge podge onto your wood
* mine if from the AMY BUTLER collection*
using the spray glue...spray a light even layer on to the flat surface of your wood
(you can use modge podge instead I just find that the spray glue dries faster)

once the glue has dried take your sandpaper and rub along the edges of the wood
This will tear the paper off of the wood for you leaving clean crisp edges

Now is the fun part...I got out my collection of ANTHROPOLOGIE knobs and picked one that went with my plaque colors

I went with a simple white knob for this plaque
Using your handy dandy tool kit

(thank you hubby for this wonderful christmas present)
take out your pliers and bend the knob screw until it snaps off
**or get your hubby to do it ;) **
(if your whole screw snaps off skip down to the bottom and follow type TWO of the plaque directions)

now eyeball where you want your knob to go on your plaque....Mark the center with a small pencil dot
now using a philips head screwdriver make a hole in the wood for the knob to go in to


now to make sure your knob stays in place use your E600 glue and rub it all around the flat part of your knob

screw your knob into the hole
and press down while the glue is drying

i then did a light layer of modge podge over the entire wood to give it shine and reinforce the paper even more

and there you have it!
ANTHROPOLOGIE INSPIRED KNOB PLAQUES

Here is another QUICKER version of the knob plaque as well :
(make sure the knob you choose has a screw on the back that unscrews off completely)
- after your wood has been painted

- pick the knob you would like to use

- undo the screw from the base of the knob
- using your E600 glue cover the back of the knob

- place in the center of your wood plaque

- let dry and you are done :)
SIMPLE QUICK ANTHROPOLOGIE INSPIRED KNOB PLAQUES!

now i just have to decide where to put these beauties!
-----------------------------------------------
PLEASE CLICK HERE TO SEE ALL THE GREAT SITES I LINKED UP TO!!
AND A SPECIAL ONE TIME LINK UP :

PLEASE CLICK HERE TO SEE ALL THE GREAT SITES I LINKED UP TO!!
AND A SPECIAL ONE TIME LINK UP :
LOVE these. I HAVE to make them for sure. I would hang a whole bunch of them on one wall! ahhh too cute!
ReplyDeleteThese are too cute! I want to make these! I'd love for you to link up over here http://iheartnaptime.blogspot.com/2010/04/sundae-scoop-link-party.html
ReplyDeleteGood Idea. I made the jars you featured with the paper covered lids. They turned out really cute. Thanks for all your fun ideas. Keep it up!!!
ReplyDeletelove your stuff!
ReplyDeletei'm your newest follower!
♥
i am in love with this DIY! the pattern you used is lovely! going to enter your giveaway now... =)
ReplyDeleteThis is a very cute and easy idea. Lucky you, to have all of those cute knobs.
ReplyDeletedelightful project! ...with a great tutorial, too.
ReplyDeleteThese are so cute!! Great for hanging the millions of tote bags I have - :D
ReplyDeleteI was at Anthro yesterday and didn't see these little plaques for sale. Good thing because I like yours better!
ReplyDeleteAs always thanks for the supportive comments :)
ReplyDeleteOh, these are gorgeous! I feel like you could put one in every room... :)
ReplyDeleteWe have a Friday Fun Finds party- if you're interested, we'd love it if you'd link to this!
You are so clever, these are great! Glad I stopped by!
ReplyDeleteSo cute! And now you've shown us, I can see they'd be pretty easy to make...
ReplyDeleteI love these! I featured these over at iheartnaptime.blogspot.com. Hope to see you again this weekend at Sundae Scoop!
ReplyDeleteOh, I just picked up two of the cutest vintage knobs a couple weeks ago because they were only .59 cents each, but they don't match and I had no idea what I was going to do with two mismatched cutie knobs. Thank you so much for the solution to my problem. I'm going to get right on this one! I can't wait!
ReplyDeletebeautiful!
ReplyDeleteThese are great - How are you mounting them to the wall, though? I've been thinking of trying something similar for hanging jewelry on next to my dresser mirror... I was going to put the knobs right into the wall and my husband said put them on wood first and I couldn't quite see how that would be attractive... so, thanks!! you definitely made them attractive!
ReplyDeleteHi Jocelyn,
ReplyDeleteThanks for your comment...I just put a picture mounting kit on the back of the wood to hang it on the wall :) super cheap and easy to do! If you make a set for yourself I would love to see them!
Thanks so much for sharing this. I'm making some this weekend for sure! I think I'll take my coat-rack shelf down and hang some of these in it's place.
ReplyDeleteI love this! Love the paper, love the knobs! I wonder if you could just screw the knobs on there when you drill the hole?
ReplyDeleteKathy,
ReplyDeleteMy knob screws were too long...they would have shown or run too far through the back...that is why I had to unscrew or cut mine off :) I am sure if you found shorter screws you could very easily just screw them in!
{Brittany}
Those are REALLY cute! Thanks for posting this on Favorite Things Friday!
ReplyDeleteBrittany,
ReplyDeleteVery pretty! Thanks for the how to :)
Linda
Great job, I didn't know that sand paper tip! It did make a nice neat edge! I am so glad i found your blog! I am a new follower. If you get a chance I would love for you to peek at my blog www.thepolkadotcloset.blogspot.com
ReplyDeleteThank You Carol
FABULOUS tutorial! And what a great idea! Thanks for sharing, they're VERY cute!!
ReplyDeleteI just love what you did with the knobs and the play of the knobs against the decorative paper is a visual treat.
ReplyDeleteNow this is fabulous~ Well done!
ReplyDeleteLeer el mundo blog, bastante bueno
ReplyDelete